
Vue2使用笔记10--路由鉴权
更新日期:
最近在使用 Vue2 作为项目中前端的框架,《Vue2 使用笔记》系列用于记录过程中的一些使用和解决方法。本文记录给路由添加鉴权的过程。
给路由添加鉴权
Vue router提供了导航守卫的功能,主要用来通过跳转或取消的方式守卫导航。参数或查询的改变并不会触发进入/离开的导航守卫。
全局守卫
这里我们使用全局的守卫,来进行整体的路由鉴权。
使用router.beforeEach注册一个全局前置守卫:
1 | import Router from "vue-router"; |
这里我们讲一下三个参数:
to: Route: 即将要进入的目标路由对象from: Route: 当前导航正要离开的路由next: Function: 一定要调用该方法来resolve这个钩子
路由配置
我们来调整下路由配置,增加以下三个选项:
meta.title:配置document.title,即标签页说明meta.accessRole:配置允许进入的角色,支持string或是[string]类型meta.forbidRole:配置禁止进入的角色,优先级大于accessRole,同样支持string或是[string]类型
同时我们加上个 404 Not Found 和 No Auth 的页面,配置如下:
1 | // routes.js |
这里的 visitor、maintainer、owner 分别为对应的角色,我们结合一起来看看鉴权的逻辑吧。
鉴权逻辑
权限的计算在后面会讲到,我们只需要知道 accessCompute 可根据权限 Map 和角色名单来匹配是否命中。
1 | import accessCompute from "./accessCompute"; |
权限计算
这里我们通过获取一个权限列表里的角色拥有,来进行名单命中:
1 | // accessCompute.js |
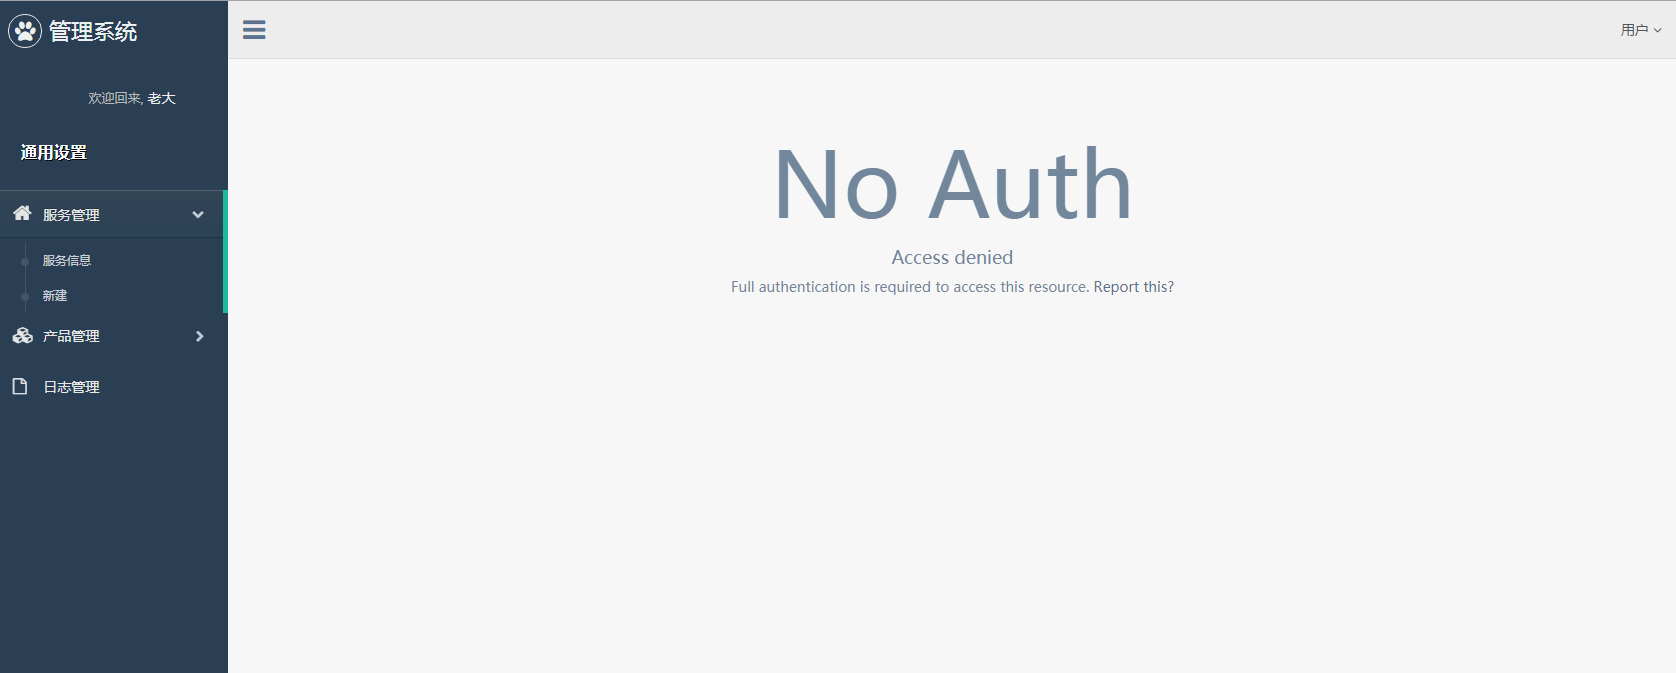
页面效果
- 进入服务管理->新建(无权限)
结束语
这里面还有一些东西没考虑,就是当我们的权限并不能简单地只用true和false来表示,很多时候会有更复杂的场景。同时,我们需要在路由守卫鉴权前拿到权限Map,针对具体场景来调整吧。
此处查看项目代码
此处查看页面效果

码生艰难,写文不易,给我家猪囤点猫粮了喵~
查看Github有更多内容噢:https://github.com/godbasin
更欢迎来被删的前端游乐场边撸猫边学前端噢
如果你想要关注日常生活中的我,欢迎关注“牧羊的猪”公众号噢