By
被删
更新日期:
最近在使用 Vue2 作为项目中前端的框架,《Vue2 使用笔记》系列用于记录过程中的一些使用和解决方法。本文记录添加 Promise 弹窗的过程。
弹窗设计
我们原生的window.confirm()会阻塞进程,同时也不支持自定义样式。所以我们这里使用自己的弹窗,同时希望以 Promise 的方式来调用。
逻辑实现
首先,我们最终想要的效果是:使用 Promise 来调用弹窗确认,通过 resolve 和 reject 的方式来进行确认操作。故我们需要生产以下功能:
- 一个调用方法,返回一个 Promise。
- 该方法会触发弹窗,该弹窗为一个组件。
- 通过 Store 的方式控制弹窗的影藏展示、提示内容等。
弹窗调用方法
为了方便拓展性,我们这样操作:
- setDialog: 可控制按钮的数量和显示,resolve 返回按钮的序号。
- confirmDialog:在 setDialog 的基础上,封装成常用的 confirm 调用方式。
来看看实现:
1
2
3
4
5
6
7
8
9
10
11
12
13
14
15
16
17
18
19
20
21
22
23
24
25
26
27
28
29
30
31
32
33
34
35
36
37
38
39
40
41
42
43
44
| import dialogStore from "components/AppDialog/dialogStore";
export function setDialog({
title,
contents = [],
buttons = [{ text: "确定", class: "btn-primary" }]
}) {
return new Promise((resolve, reject) => {
dialogStore.commit("setDialog", {
title,
contents,
buttons,
resolve,
reject
});
});
}
export function confirmDialog(content) {
return new Promise((resolve, reject) => {
setDialog({
contents: [content],
buttons: [
{ text: "确定", class: "btn-primary" },
{ text: "取消", class: "btn-default" }
]
}).then(index => {
if (index == 0) {
resolve();
} else {
reject();
}
});
});
}
export default setDialog;
|
这里我们主要处理调用的逻辑,而 confirmDialog 多处理了 index 是否为确认按钮的逻辑。更多的时候,我们是通过 dialogStore 来控制弹窗的内容和展示。
dialogStore
不多说,上码:
1
2
3
4
5
6
7
8
9
10
11
12
13
14
15
16
17
18
19
20
21
22
23
24
25
26
27
28
29
30
31
32
33
34
35
36
37
38
39
40
41
42
43
44
45
46
47
48
49
| import Vue from "vue";
import Vuex from "vuex";
Vue.use(Vuex);
const dialogStore = new Vuex.Store({
state: {
data: {
title: "",
contents: [""],
buttons: [
{
text: "确定",
class: "btn-primary"
}
]
},
promise: null
},
mutations: {
click(state, index) {
$("#confirmModal").modal("hide");
state.promise.resolve(index);
},
close(state) {
$("#confirmModal").modal("hide");
state.promise.reject();
},
setDialog(state, { title, contents, buttons, resolve, reject }) {
state.data = {
title,
contents,
buttons
};
state.promise = {
resolve,
reject
};
$("#confirmModal").modal("show");
}
}
});
export default dialogStore;
|
我们在 dialogStore 中提供了三个 mutations:
- 设置弹窗内容,同时显示弹窗。
- 点击按钮,同时 promise resolve,并返回点击的 button 的 index。
- 关闭弹窗,同时 promise reject。
其实我们在控制一些内容的时候,使用一个公共的对象也是可以实现的。为什么要用Store呢?因为Store能在模版中使用,这里主要是依赖它来控制弹窗的展示内容,当然我们还可以用各种各样的方式来实现的。
弹窗组件
这里我们需要在 Sidebar 上使用到这个用户名,故我们需要在该组件中引入:
1
2
3
4
5
6
7
8
9
10
11
12
13
14
15
16
17
18
19
20
21
22
23
24
25
26
27
28
29
30
31
32
33
34
35
36
37
38
39
| <template>
<div class="modal fade in" id="confirmModal" tabindex="-1" role="dialog" aria-labelledby="myModalLabel">
<div class="modal-dialog" role="document" style="margin-top: 200px;">
<div class="modal-content" >
<div class="modal-header">
<button type="button" class="close" data-dismiss="modal" aria-label="Close" @click="close"><span aria-hidden="true">×</span></button>
<h4 class="modal-title" id="myModalLabel">{{data.title || '请确认'}}</h4>
</div>
<div class="modal-body">
<p v-for="content in data.contents" :key="content">{{content}}</p>
</div>
<div class="modal-footer" v-if="data.buttons && data.buttons.length">
<button v-for="(btn, index) in data.buttons" :key="index" type="button" class="btn" :class="btn.class" @click="clickButton(index)">{{btn.text}}</button>
</div>
</div>
</div>
</div>
</template>
<script>
import dialogStore from "./dialogStore";
export default {
name: "app-dialog",
computed: {
data() {
return dialogStore.state.data;
}
},
methods: {
clickButton(index) {
dialogStore.commit("click", index);
},
close() {
dialogStore.commit("close");
}
}
};
</script>
|
当然,我们还需要在最外层注册和引入该组件,这里就不多说了,感兴趣可以参考下源码。
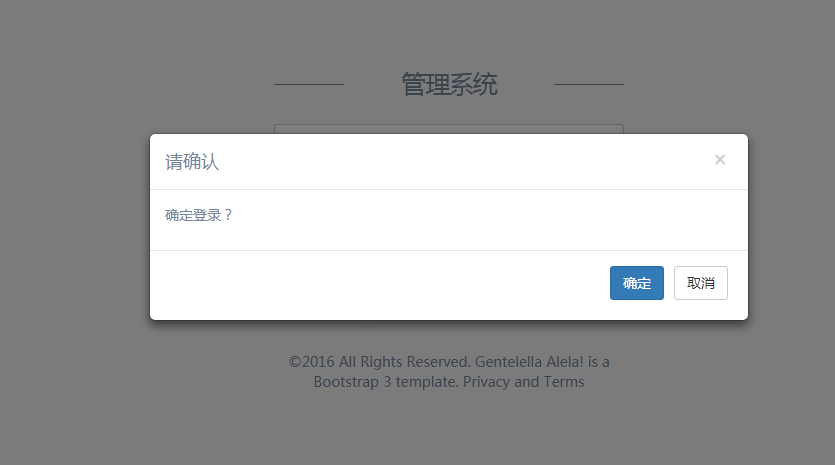
弹窗使用
我们在登录页面,添加该弹窗提示。
1
2
3
4
5
6
7
8
9
10
11
12
13
14
15
16
17
18
19
20
21
|
import { confirmDialog } from "tools/setDialog";
export default {
methods: {
login() {
const { username, password } = this;
if (!username || !password) {
this.error.text = "用户名和密码不能为空";
this.error.shown = true;
return;
}
confirmDialog(`确定登录?`).then(() => {
userStore.dispatch("login", { username, password });
this.$router.push({ name: "App" });
});
}
}
};
|
结束语
本节我们介绍了使用Promise方式实现弹窗的过程,这里面有个比较尴尬的问题就是,由于全局弹窗只有这么一个,所以如果有二次确认的过程(两个以上弹窗),这样子就不合适啦。
此处查看项目代码
此处查看页面效果
查看Github有更多内容噢:https://github.com/godbasin
更欢迎来被删的前端游乐场边撸猫边学前端噢
如果你想要关注日常生活中的我,欢迎关注“牧羊的猪”公众号噢

