Vue2使用笔记9--监视路由
更新日期:
最近在使用Vue2作为项目中前端的框架,《Vue2使用笔记》系列用于记录过程中的一些使用和解决方法。
本文记录vue中处理单个组件加载不同路由时进行相关处理的过程。
多路由单组件
当我们使用单个组件绑定多个路由的时候,路由的跳转并不能再次触发组件的重建,此时我们需要对路由进行监视。
vue-router2
对于vue-router 2版本的部分说明,本骚年在前面章节已经说过,大家有兴趣可以移步《Vue2使用笔记4–vue-router使用》。
参考
使用同一组件进行新建以及编辑
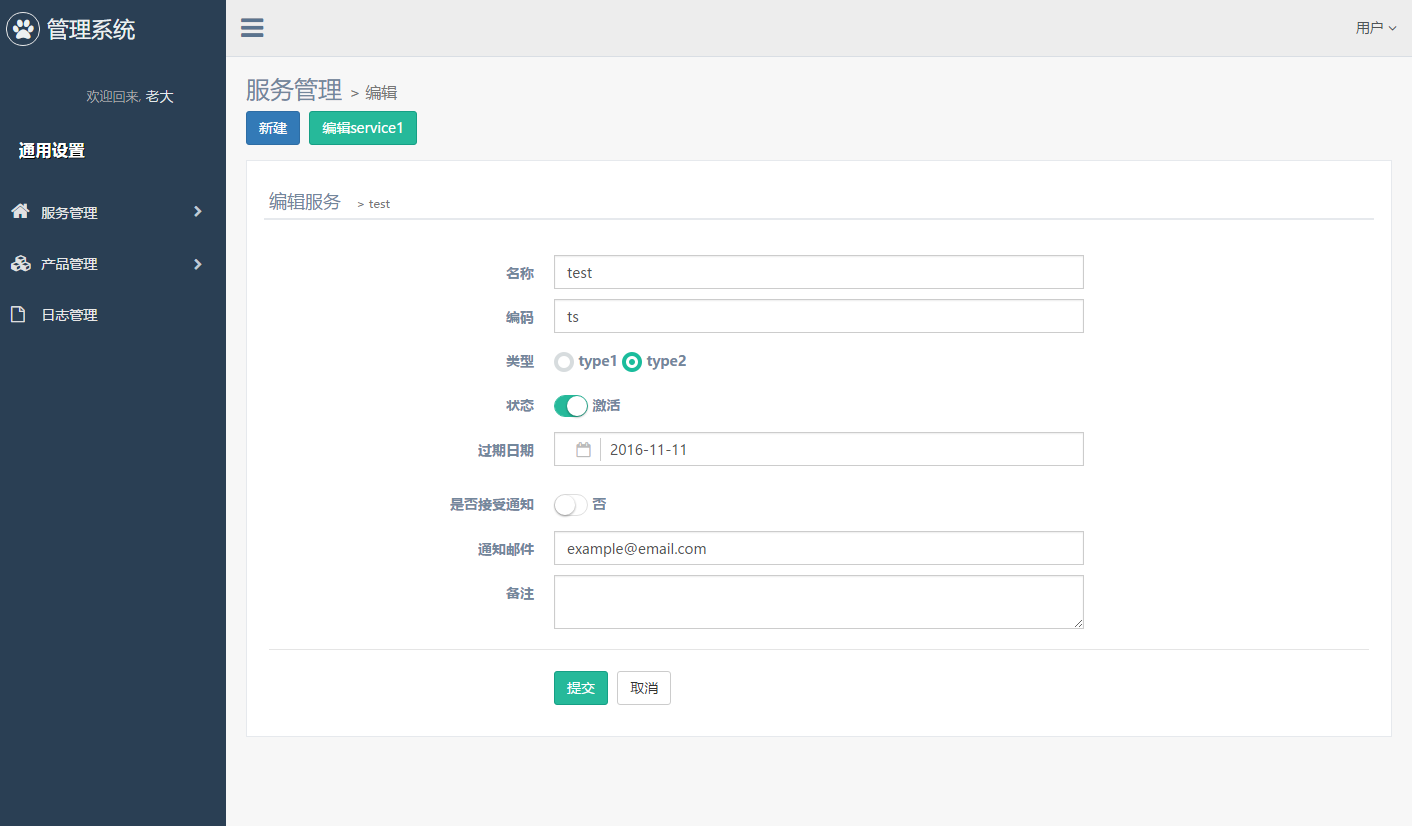
这里我们将修改ServiceAdd组件,来进行新建以及编辑的不同处理。
添加编辑路由
我们在main.js中添加编辑服务的路由,与新建使用一个组件;1
2
3
4
5
6
7
8
9
10
11
12
13
14
15
16
17
18
19
20
21
22
23
24
25
26const routes = [
...
{
path: '/app',
component: App,
name: 'App',
// 设置子路由
children: [
...
, {
// 添加服务
path: 'add/service',
component: ServiceAdd,
name: 'ServiceAdd'
}, {
// 修改服务
path: 'edit/service/:id',
component: ServiceAdd,
name: 'ServiceEdit'
}
...
]
}
...
]
将组件初始化事件进行调整
接下来我们调整组件的初始化事件,使其判断当前路由并进行相关处理:1
2
3
4
5
6
7
8
9
10
11
12
13
14
15
16
17
18
19mounted() {
var that = this;
// 初始化检测
that.init();
// 设置iCheck插件初始化
SetICheck(that);
// 设置switchery插件初始化
SetSwitchery(that);
// 设置daterangepicker插件初始化
SetDaterangepicker(that, '#single_cal3');
},
// 监视路由
watch: {
$route() {
// 当路由改变,进行初始化检测
this.init();
}
};
相关时间处理
下面是一些初始化检测,以及相关调用的事件1
2
3
4
5
6
7
8
9
10
11
12
13
14
15
16
17
18
19
20
21
22
23
24
25
26
27
28
29
30
31
32
33
34
35
36
37
38
39
40
41
42
43
44
45
46
47
48
49
50
51
52
53
54
55
56
57
58
59
60methods: {
// 初始化事件
init() {
var that = this;
// isEdit?
if (that.$route.params.id) {
that.edit(that.$route.params.id);
} else {
var data = initData();
// 初始化默认值
that.setChange(data);
$.each(data, (key, item) => {
that.$set(that, key, item);
});
}
},
// 编辑事件
edit(id) {
var that = this;
that.$set(that, 'isNew', false);
// 获取服务数据,这里使用模拟数据
$.get(`./static/service1.json`, repo => {
// 设置组件data的值
that.setChange(repo);
$.each(repo, (key, item) => {
that.$set(that, key, item);
});
});
},
// 对插件进行赋值设置
setChange(item) {
var that = this;
// 设置iCheck赋值
$(`input.flat[name="type"][value="${item.type}"]`).iCheck('check');
// 设置switchery赋值
if (item.state !== that.state) {
$('.js-switch[name="state"]').trigger('click');
}
if (item.directIssue !== that.directIssue) {
$('.js-switch[name="directIssue"]').trigger('click');
}
},
submit() {
var that = this,
text;
// 先做一些简单的校验,不通过则显示错误信息
if (!that.name) {
text = '请填写名称';
}
if (text) {
that.error.text = text;
that.error.shown = true;
return;
}
that.error.shown = false;
var that = this;
that.$router.push('/app/terminals');
}
}
页面效果
- 新建

- 编辑

结束语
当初对于多个路由匹配单个组件,本骚年还以为一定会有一些方法,在路由改变的时候进行销毁重建组件,后来找不到,最终也就监视路由进行处理。虽然有可能是本骚年太蠢没找到对应的方法调用,但是其实这种监视路由处理的方法或许更合理一些呢。
此处查看项目代码
此处查看页面效果

码生艰难,写文不易,给我家猪囤点猫粮了喵~
查看Github有更多内容噢:https://github.com/godbasin
更欢迎来被删的前端游乐场边撸猫边学前端噢
如果你想要关注日常生活中的我,欢迎关注“牧羊的猪”公众号噢
