
玩转Angular2(8)--表单的radio和checkbox
更新日期:
因为项目原因又玩上了Angular2(v4.0+),《玩转Angular2》系列用于探索一些灵活或者新的用法。
本文结合前面的响应式表单和动态表单,讲述继续拓展radio和checkbox表单选项的过程。
动态表单与自定义input控件
自定义input控件
前面有较详细讲解自定义input表单过程,参考《玩转Angular2(5)–自定义input表单控件》。
过程无非是将Angular原本的双向绑定过程抽离出来,自己定义实现而已。通过Angular提供的一些接口,还是很容易达到想要的效果的。
这里我们再拓展两个:radio和checkbox类型的input控件。
radio
通常我们使用radio,除了双向绑定的ngModel之外,还有的大概就是选项了。
选项我们使用统一的数据结构{id:id, text:text}。
结合前面我们抽象出来的CustomInputComponent和customInputAccessor,实现radio-group还是很简单的,如下:
1 | import {Component, Input, Output} from '@angular/core'; |
checkbox
而要实现checkbox就稍微复杂一点,毕竟我们不能直接使用ngModel来双向绑定。
这里我们约定以数组方式返回选中的id,以上的通用class不能直接使用,我们需要调整双向绑定的过程。如下:
1 | import {Component, Input} from '@angular/core'; |
到了这里,是不是大家的自定义input控件技能又提升了。
动态表单与自定义input控件
大家会不会很好奇,我们自行封装了这些自定义input控件,要怎么使用呢?
其实很简单,我们跟其他原生的input一样使用就好了,使用一个formControlName就可以很方便地跟formGroup结合起来了。
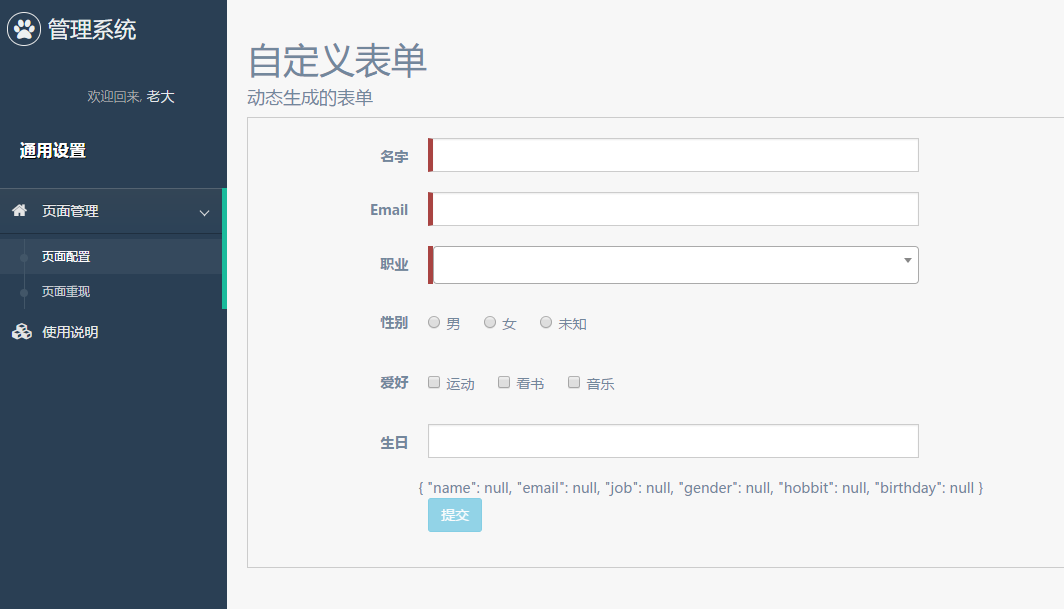
这里我们把目前为止所有封装过的自定义input都放进来检验使用:
1 | <form class="form-horizontal" [formGroup]="dynamicForm" (ngSubmit)="submit()" style="border: solid 1px #ccc; padding: 20px 0;"> |
然后我们调整输入:
1 | // dynamic-form.config.ts |
效果图如下:
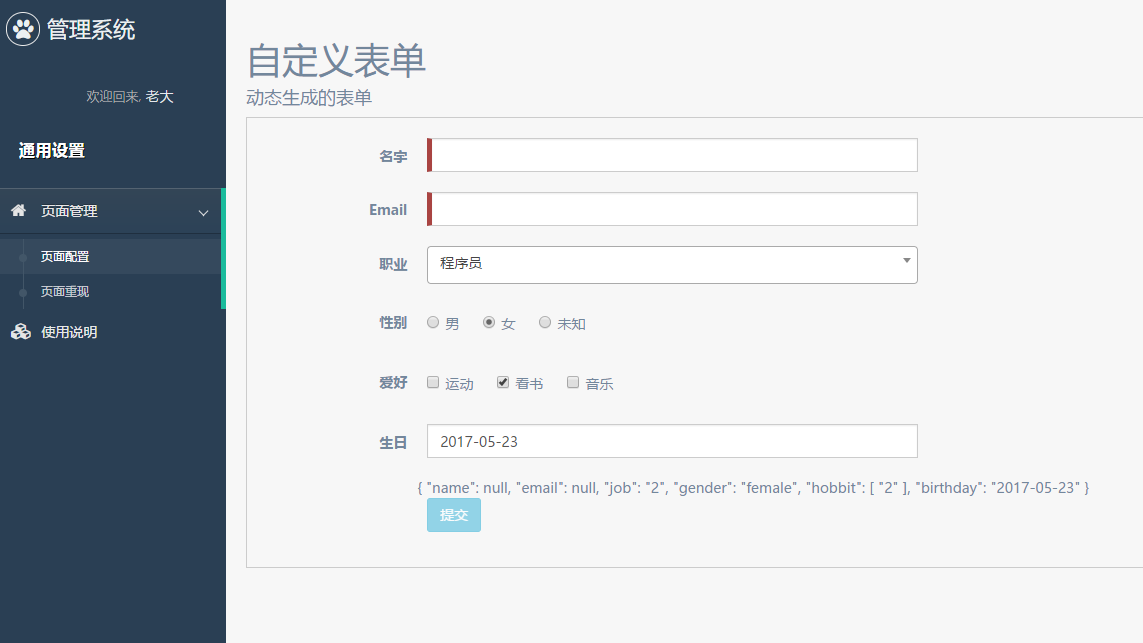
默认值加载获取
为了检验我们的初始值能否正确加载,我们添加默认值:
1 | // dynamic-form.config.ts |
同时我们注入到控件:
1 | <dynamic-form [config]="customForms" [model]="customFormsDefault"></dynamic-form> |
效果图如下:
结束语
目前我们能很方便地拓展需要的动态表单,来做一些配置化的东西。
而当我们真正在项目中使用的时候,或许还需要考虑从接口获取数据(初始值)的情况,不过解决办法也有很多,大家多去实践吧。
此处查看项目代码
此处查看页面效果

码生艰难,写文不易,给我家猪囤点猫粮了喵~
查看Github有更多内容噢:https://github.com/godbasin
更欢迎来被删的前端游乐场边撸猫边学前端噢
如果你想要关注日常生活中的我,欢迎关注“牧羊的猪”公众号噢